
Complete Guide On How To Make Your Own Custom Rubber Stamps

4.6 out of 5
| Language | : | English |
| File size | : | 5126 KB |
| Text-to-Speech | : | Enabled |
| Screen Reader | : | Supported |
| Enhanced typesetting | : | Enabled |
| Print length | : | 50 pages |
| Lending | : | Enabled |
Custom rubber stamps are a great way to add a personal touch to your correspondence, crafting projects, and more. They're also relatively easy to make, and with a little practice, you can create beautiful, professional-looking stamps that will last for years.
What You'll Need
To make your own custom rubber stamps, you'll need the following materials:
- A piece of rubber carving block
- A carving tool (such as a linoleum cutter or exacto knife)
- A design for your stamp
- Transfer paper
- A brayer or spoon
- Ink
- A stamp pad (optional)
Step 1: Design Your Stamp
The first step is to design your stamp. You can use any design you like, but keep in mind that the simpler the design, the easier it will be to carve. If you're not sure where to start, there are plenty of free online resources that can help you create a custom stamp design.
Step 2: Transfer Your Design to the Rubber Block
Once you have your design, you need to transfer it to the rubber block. To do this, you'll use transfer paper. Place the transfer paper on top of the rubber block and trace your design onto the paper. Be sure to press down hard so that the design transfers completely.
Step 3: Carve Your Stamp
Now it's time to carve your stamp. Start by outlining the design with a sharp carving tool. Then, carefully carve away the areas that will not be inked. Be sure to carve slowly and carefully, and don't be afraid to make mistakes. If you make a mistake, you can always fill it in with rubber cement.
Step 4: Mount Your Stamp
Once your stamp is carved, you need to mount it on a block of wood or acrylic. This will make it easier to hold and use the stamp. To mount your stamp, simply apply a layer of adhesive to the back of the stamp and press it onto the block.
Step 5: Ink Your Stamp
Now you're ready to ink your stamp! To do this, simply apply a thin layer of ink to the stamp pad. Then, press the stamp onto the ink pad to transfer the ink to the stamp.
Step 6: Stamp!
Now it's time to start stamping! To stamp, simply press the stamp onto the surface you want to stamp. Be sure to apply even pressure to ensure that the entire design transfers.
Tips for Using Rubber Stamps
Here are a few tips for using rubber stamps:
- Use a light touch when stamping. This will help to prevent the ink from bleeding.
- Experiment with different inks and surfaces to create different effects.
- Clean your stamps regularly to keep them in good condition.
Making your own custom rubber stamps is a fun and rewarding experience. With a little practice, you can create beautiful, professional-looking stamps that will last for years. So what are you waiting for? Get started today!
4.6 out of 5
| Language | : | English |
| File size | : | 5126 KB |
| Text-to-Speech | : | Enabled |
| Screen Reader | : | Supported |
| Enhanced typesetting | : | Enabled |
| Print length | : | 50 pages |
| Lending | : | Enabled |
Do you want to contribute by writing guest posts on this blog?
Please contact us and send us a resume of previous articles that you have written.
 Book
Book Novel
Novel Page
Page Chapter
 Text
Text Story
Story Genre
Genre Reader
 Library
 Paperback
 E-book
 Magazine
 Newspaper
 Paragraph
 Sentence
 Bookmark
 Shelf
Shelf Glossary
 Bibliography
 Foreword
 Preface
 Synopsis
 Annotation
 Footnote
 Manuscript
 Scroll
 Codex
Codex Tome
Tome Bestseller
 Classics
 Library card
 Narrative
 Biography
 Autobiography
 Memoir
 Reference
 Encyclopedia
 Lenka Peterson
 Sloane Mcclain
 Lester Wunderman
 Konnilaree Sanders
 Konnie Wong
 Sara Anson Vaux
 Manning Marable
 Stephen Spignesi
 Seth Wickersham
 Laura Neutzling
 Leigh Forbes
 Robert Kunstaetter
 Paul Annacone
 Virginia Smith
 Leah Vanderveldt
 Lily Oliver
 Lawrence Wray
 Laura Perryman
 Richard M Levy
 Siddhartha Gigoo
Light bulbAdvertise smarter! Our strategic ad space ensures maximum exposure. Reserve your spot today!
 Wesley ReedUnveil the Secrets of Divine Proportion: Unlocking Leonardo da Vinci's Hidden...

 Beau CarterUnlock Your Leadership Potential with the Partnering Approach: The Essential...
 Italo CalvinoThe Politics of Paul Robeson, Othello, Margaret Walker Alexander, and the...
 Julian PowellUnveiling the Oxford Textbook of Palliative Nursing: A Comprehensive Guide...
 Dan BellFollow ·2.6k
 Harvey HughesFollow ·19k
 Ralph EllisonFollow ·13.2k
 Hayden MitchellFollow ·3k
 Colton CarterFollow ·10.9k
 Bryson HayesFollow ·13.6k
 Lord ByronFollow ·19.5k
 Francis TurnerFollow ·15k
 Forrest Reed
Hockey Grit, Grind, Mind: The Ultimate Guide to Mental...
Hockey is a tough...
 Juan Rulfo
Unlock Your Inner Artist: Embark on a Sketching Journey...
Embrace the Beauty of Nature Through Quick...

 Nathaniel Hawthorne
So You Think You're a Philadelphia Phillies Fan?
The Philadelphia Phillies are one of the most...
 Jeff Foster
Goal-Based Investing: A Comprehensive Guide to Achieving...
Investing is not...
 Aleksandr Pushkin
GNOMEDOM: The Future Unfolds (Gnomedom Tales 1)
Escape into the enchanting world of Gnomedom...
 Branden Simmons
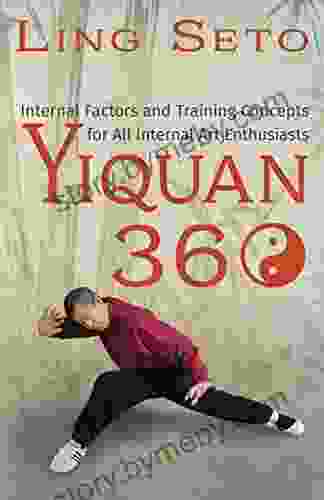
Internal Factors And Training Concepts For All Internal...
Internal arts, such as Tai...
4.6 out of 5
| Language | : | English |
| File size | : | 5126 KB |
| Text-to-Speech | : | Enabled |
| Screen Reader | : | Supported |
| Enhanced typesetting | : | Enabled |
| Print length | : | 50 pages |
| Lending | : | Enabled |
